The world of medicine and technology is entwined in an intricate dance. Every beat in technological advancement leads to better patient care, and medical printers play a pivotal role in this symphony. But, with a plethora of options available, how does one decide different types of medical printers fit the bill? Let’s dive deep.
Table of Contents
Introduction
Ever paused to think about the magic behind those clear images that show the inside of our bodies? Medical imaging has long been a cornerstone of diagnostics. And a significant player in this arena? Medical printers. Just as a clear photograph can tell a thousand words, a precise medical image can sometimes make all the difference in a diagnosis.
Brief History of Medical Printers
Remember when photographs were developed from films in dark rooms? Medical imaging had a similar phase. It transitioned from film-based methods to advanced digital printing. These advancements haven’t just improved image quality; they’ve revolutionized how diagnoses are made.
Why Choosing the Right Printer Matters
Imagine trying to spot a rare bird in a grainy photograph. Tough, right? Similarly, clarity in medical imaging can drastically affect patient outcomes. Moreover, in the fast-paced world of healthcare, operational efficiency isn’t just a perk—it’s crucial.
Different Types of Medical Printers
Medical printers are crucial in healthcare for producing high-quality images from diagnostic equipment such as X-rays, MRIs, and CT scanners. These printers differ in their internal mechanisms, printing processes, and image quality capabilities, tailored to meet specific clinical needs.
1. Laser Printers
Laser printers are widely used in medical settings for their efficiency, speed, and exceptional print quality. They utilize laser technology to produce images and text on a variety of media, including plain paper and medical-grade films. Laser printers are ideal for printing reports, medical records, and high-resolution diagnostic images with sharp detail.
Advantages:
- Fast printing speed, makes them suitable for busy healthcare environments.
- High-quality image and text output.
- Suitable for bulk printing tasks.
Applications:
- Printing diagnostic images, such as X-rays, CT scans, and MRI images.
- Producing patient reports, medical records, and referral documents.
- Printing high-resolution medical photographs.
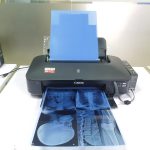
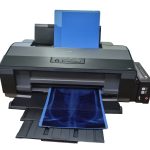
2. Inkjet Printers
Inkjet printers use liquid ink sprayed through tiny nozzles to create images and text on paper and other media. They are versatile and can print on various paper sizes, as well as glossy photo paper and labels. Inkjet printers are well-suited for producing color medical images and documents with vibrant hues.
Advantages:
- Capable of producing high-quality color prints.
- Versatile, supporting various paper types and sizes.
- Often more affordable than laser printers.
Applications:
- Printing color medical images, such as ultrasounds and endoscopy results.
- Creating color-coded medical charts and diagrams.
- Producing patient education materials with visuals.
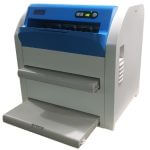
3. Thermal Printers
Thermal printers use heat to transfer images and text onto special thermal paper. They are commonly used in portable medical devices due to their compact size and ease of use. Thermal printers are well-suited for on-the-spot printing of vital signs, electrocardiograms (ECGs), and other point-of-care documents.
Advantages:
- Compact and portable, suitable for mobile healthcare settings.
- Instant printing without the need for ink or toner replacement.
- Low operating costs.
Applications:
- Printing vital signs, including blood pressure, heart rate, and temperature readings.
- Producing ECG strips and fetal monitoring reports.
- On-site printing in emergency and ambulatory care settings.
4. Dye-Sublimation Printers
Dye-sublimation printers use heat to transfer dye onto specialized paper, resulting in high-quality, continuous-tone images. They are commonly used for medical imaging where precise color reproduction is crucial.
Advantages:
- Excellent color accuracy and image sharpness.
- Capable of producing continuous-tone prints, similar to photographs.
- Suitable for printing high-resolution medical images.
Applications:
- Printing radiology images with accurate color representation.
- Producing dermatology photographs for skin analysis.
- Creating medical teaching materials with detailed visuals.
5. Dot Matrix Printers
While not as commonly used today, dot matrix printers are still employed in some medical settings due to their reliability and ability to create multiple copies of documents simultaneously. Dot matrix printers use a series of pins to strike an ink ribbon, leaving impressions on carbon paper or multi-part forms.
Advantages:
- Multi-copy printing for generating duplicates of documents.
- Durable and well-suited for harsh environments.
- Lower operating costs compared to other printer types.
Applications:
- Printing multiple copies of invoices, lab reports, and other forms.
- Creating carbon copies of patient receipts and prescription orders.
- Producing hard copies of patient labels and identification bracelets.
6. DICOM Printers
DICOM printers are essential tools in the healthcare industry, designed to produce high-quality hard copies of medical images. They comply with the DICOM standard, ensuring seamless integration with various imaging modalities and Picture Archiving and Communication Systems (PACS). DICOM printers play a crucial role in facilitating efficient image review, reliable documentation, patient communication, and referral purposes. Their ability to produce tangible and accurate medical images enhances diagnostic accuracy and improves communication among healthcare professionals.
Advantages
- Seamless integration with medical systems.
- High-quality output for accurate diagnostics.
- Efficient image review for quick decisions.
- Reliable documentation of patient data.
- Enhanced communication with visual aids.
Applications
- Diagnostic imaging (X-rays, CT scans, MRI).
- Patient education with visual materials.
- Referral and consultation communication.
- Quality assurance through consistent image comparison.
- Backup and archiving for data preservation.
Understanding these differences helps healthcare facilities select the best printer for their needs, balancing factors like budget, image quality requirements, and the types of diagnostic images they need to produce.
Practical Tips on Selecting the Right Medical Printer for a Healthcare Facility
Choosing the right medical printer is crucial for healthcare facilities as it directly impacts image quality, diagnostic accuracy, operational efficiency, and overall costs. Here are practical tips to help you select the best medical printer based on factors like budget, workload, and specific imaging needs.
1. Assess Your Imaging Needs
Understanding your facility’s specific imaging requirements is the first step in selecting the right printer.
- Type of Imaging: Determine the types of diagnostic images you need to print, such as X-rays, CT scans, MRIs, or ultrasounds. Each imaging type may have different resolution and grayscale needs.
- Color vs. Monochrome: Decide if your facility requires color printing (e.g., for ultrasound or nuclear medicine imaging) or if grayscale printing suffices (e.g., for X-rays).
- Resolution Requirements: Evaluate the resolution required for accurate diagnostics. High-resolution images are crucial for detailed assessments, especially in specialties like orthopedics or oncology.
2. Consider the Volume and Speed of Printing
Evaluate the expected workload to determine the printer’s speed and capacity needs.
- Daily Print Volume: Estimate the average number of images printed daily. High-volume facilities, such as hospitals, may need printers with faster speeds and larger paper or film capacity.
- Print Speed: Look for printers with high pages-per-minute (ppm) ratings if quick turnaround times are essential. Laser and thermal printers generally offer faster printing speeds than inkjet printers.
- Automatic Printing Features: Consider printers with automatic film loading or multiple trays to handle large workloads efficiently without constant supervision.
3. Evaluate Budget Constraints
Balancing performance with cost is crucial, especially for facilities with tight budgets.
- Initial Purchase Cost: Laser printers typically have higher upfront costs compared to inkjet or thermal printers. Consider how much you are willing to invest initially.
- Operational Costs: Factor in ongoing costs, including film, ink or toner, maintenance, and repairs. Inkjet printers may have lower initial costs but can have higher per-print costs due to frequent ink replacement.
- Long-Term Value: Consider the long-term reliability and durability of the printer. Spending more initially on a reliable laser printer could save money on maintenance and downtime in the long run.
4. Focus on Image Quality and Diagnostic Accuracy
Image quality is paramount in medical imaging, affecting the ability to diagnose accurately.
- Resolution and DPI (Dots Per Inch): Higher DPI values result in sharper images. Laser and thermal printers generally offer better resolution compared to inkjets.
- Contrast and Detail: Ensure the printer provides excellent grayscale or color reproduction, depending on your needs. Laser printers are known for their superior contrast and detail in grayscale images.
- Image Processing Capabilities: Look for printers with advanced image processing features that enhance sharpness, contrast, and overall quality.
5. Check Compatibility with Existing Systems
Ensure the printer integrates seamlessly with your existing diagnostic equipment and IT infrastructure.
- DICOM Compatibility: The printer should be compatible with DICOM (Digital Imaging and Communications in Medicine) standards, which ensure it can receive and print images from various imaging modalities.
- Software Integration: Look for printers that easily integrate with your PACS (Picture Archiving and Communication System) or other medical imaging software, streamlining workflow and reducing manual errors.
6. Review Maintenance and Support Options
Reliable maintenance and support are essential for minimizing downtime and maintaining image quality.
- Ease of Maintenance: Consider printers that are easy to maintain, with user-friendly access to consumables like ink or toner and straightforward cleaning processes.
- Service Contracts: Evaluate available service contracts or warranties that provide maintenance, calibration, and support to keep the printer in optimal condition.
- Availability of Parts and Consumables: Choose a printer brand with readily available consumables and spare parts to avoid long downtimes.
7. Evaluate Space and Environment Requirements
Physical space and environmental factors can influence printer selection.
- Size and Footprint: Ensure the printer fits in the designated space within your facility. Thermal printers tend to have a smaller footprint compared to larger laser models.
- Operating Environment: Some printers may require specific temperature or humidity conditions to function optimally, which should be considered when choosing a printer location.
8. Consider Future Scalability
Plan for future growth or changes in imaging needs when selecting a printer.
- Upgradeable Features: Opt for printers that offer upgrade options, such as additional trays, higher resolution settings, or faster print speeds, to accommodate growing workloads.
- Modular Designs: Printers with modular designs allow you to expand capabilities without needing a complete system overhaul.
Selecting the right medical printer involves a careful assessment of your facility’s needs, budget, and operational considerations. By evaluating factors such as imaging requirements, workload, budget constraints, and long-term reliability, you can choose a printer that enhances diagnostic accuracy, streamlines workflow, and provides value for your healthcare facility.
Common Troubleshooting Issues with Medical Printers and How to Resolve Them
Medical printers are essential for producing high-quality diagnostic images, and any malfunction can disrupt clinical workflows. Here’s a guide to common troubleshooting issues with medical printers, including laser, inkjet, and thermal printers, along with practical solutions to ensure optimal performance.
1. Poor Image Quality
Poor image quality, such as blurry, faded, or uneven prints, can compromise diagnostic accuracy.
Common Causes:
- Incorrect Settings: Resolution, contrast, or grayscale settings may be misconfigured.
- Dirty Print Heads or Rollers: Dust, ink, or toner buildup can affect print quality.
- Worn-Out Printing Components: Print heads, drums, or rollers can degrade over time.
How to Resolve:
- Check Printer Settings: Verify that the settings match the imaging modality’s requirements. Adjust resolution, contrast, and other parameters as needed.
- Clean Print Heads and Rollers: Use manufacturer-recommended cleaning tools or solutions to clean the print heads, rollers, and other components.
- Replace Worn Components: Regularly inspect and replace worn or damaged parts, such as print heads or rollers, according to the manufacturer’s guidelines.
2. Paper Jams and Film Misfeeds
Paper jams and misfeeds are common issues that can cause delays and damage the printer.
Common Causes:
- Incorrect Film Loading: Misaligned or improperly loaded film can cause jams.
- Worn Rollers or Feed Mechanisms: Damaged rollers can prevent smooth feeding of film or paper.
- Obstructions: Dust, debris, or small objects inside the printer can block film pathways.
How to Resolve:
- Properly Load Film: Ensure film or paper is loaded correctly and securely in the tray, following the manufacturer’s instructions.
- Inspect and Clean Rollers: Regularly check and clean rollers and feed mechanisms to ensure they are free of dust and debris.
- Clear Obstructions: Open the printer and carefully remove any obstructions. Ensure the printer is turned off before attempting to clear jams.
3. Printer Not Responding or Connection Issues
Connection problems can cause printers to stop responding to print commands.
Common Causes:
- Network or Cable Issues: Loose or damaged cables and unstable network connections can disrupt communication between the printer and computer.
- Driver or Firmware Problems: Outdated or corrupted printer drivers or firmware can cause functionality issues.
- DICOM Communication Errors: Problems with DICOM compatibility or setup can prevent images from being sent to the printer.
How to Resolve:
- Check Connections: Inspect and secure all cables, including power, network, and data cables. Test the network connection to ensure stability.
- Update Drivers and Firmware: Regularly update printer drivers and firmware to the latest versions to ensure compatibility and optimal performance.
- Verify DICOM Settings: Check DICOM settings to ensure proper communication with imaging devices. Reconfigure settings if necessary.
4. Printer Won’t Turn On or Powers Off Unexpectedly
Power-related issues can render the printer inoperable, disrupting the printing process.
Common Causes:
- Power Supply Problems: Faulty power cables, power surges, or insufficient voltage can prevent the printer from turning on.
- Overheating: Prolonged use or insufficient ventilation can cause the printer to overheat and shut down.
- Internal Hardware Failures: Issues with internal components, such as power boards or fuses, can cause power problems.
How to Resolve:
- Check Power Cables: Ensure all power cables are securely connected and inspect for any visible damage. Replace faulty cables if necessary.
- Improve Ventilation: Make sure the printer is placed in a well-ventilated area to prevent overheating. Clean air vents regularly to allow proper airflow.
- Inspect Internal Components: For persistent power issues, consult a technician to inspect and repair internal hardware components.
5. Frequent Error Messages and Alerts
Error messages can occur due to a variety of technical and operational issues.
Common Causes:
- Misconfigured Settings: Incorrect settings or parameters can trigger errors.
- Sensor Malfunctions: Faulty sensors may incorrectly report film status or misfeeds.
- Firmware Bugs: Software glitches or bugs in the printer’s firmware can cause recurring errors.
How to Resolve:
- Reset Printer Settings: Reset the printer to factory settings to clear misconfigurations. Reconfigure settings as required for your imaging needs.
- Calibrate Sensors: Perform sensor calibrations as recommended by the manufacturer. Replace faulty sensors if calibration does not resolve the issue.
- Update Firmware: Install the latest firmware updates from the manufacturer to address known bugs and improve stability.
6. Slow Printing or Delays in Print Jobs
Slow printing can affect workflow efficiency, leading to patient delays.
Common Causes:
- High-Resolution Settings: High-resolution settings can slow down printing, especially in older printers.
- Large File Sizes: Large DICOM files or complex images can take longer to process and print.
- Insufficient Memory: Older printers with limited memory may struggle to handle multiple or large print jobs.
How to Resolve:
- Adjust Resolution: Set the resolution to an appropriate level for the required diagnostic quality. Avoid using excessively high settings unless necessary.
- Optimize File Sizes: Use image compression tools to reduce file sizes without compromising diagnostic quality.
- Upgrade Memory or Printer: For frequent delays, consider upgrading the printer’s memory or investing in a more efficient, faster model.
7. Ink or Toner Issues
Issues related to ink or toner can result in poor image quality or halted printing.
Common Causes:
- Low or Empty Cartridges: Insufficient ink or toner levels can disrupt printing.
- Clogged Nozzles: Dried ink or toner particles can clog nozzles, affecting print quality.
- Incorrect Cartridge Installation: Improperly installed cartridges may not function correctly.
How to Resolve:
- Monitor Ink Levels: Regularly check ink or toner levels and replace cartridges as needed to avoid interruptions.
- Clean Nozzles: Run the printer’s cleaning cycle or manually clean nozzles to remove clogs.
- Install Cartridges Correctly: Ensure cartridges are installed according to the manufacturer’s instructions, securing them firmly in place.
Understanding common troubleshooting issues and their solutions can help maintain the efficiency and quality of medical printers. Regular maintenance, timely updates, and proper handling can prevent most problems, ensuring that printers deliver high-quality diagnostic images consistently.
Maintenance and Calibration of Medical Printers for Optimal Performance and Image Quality
Regular maintenance and calibration of medical printers are essential for ensuring high-quality diagnostic images and the smooth operation of healthcare facilities. Proper upkeep helps to prevent malfunctions, reduce downtime, and extend the life of the equipment.
Here’s a guide to maintaining and calibrating medical printers to ensure they perform at their best.
1. Routine Maintenance Practices: Key Maintenance Tasks
Maintaining a medical printer involves several routine tasks to keep it in optimal condition. These tasks help prevent wear and tear, which can degrade print quality and cause malfunctions.
- Cleaning Print Heads: Inkjet and thermal printers can accumulate dust, ink, or thermal residue on the print heads. Regular cleaning is vital to ensure clear, sharp images. Follow the manufacturer’s recommendations on cleaning frequency and use appropriate cleaning solutions or tools.
- Inspecting Rollers and Feed Mechanisms: Paper jams and misfeeds are often caused by worn or dirty rollers. Inspect the rollers regularly and clean or replace them if needed. Ensure the feed mechanisms are functioning smoothly to avoid interruptions in printing.
- Checking Toner or Ink Levels: For laser and inkjet printers, low toner or ink can result in poor-quality prints. Monitor the levels and replace cartridges as needed to avoid streaking or faded images. Be sure to use high-quality, compatible cartridges.
- Cleaning the Printer’s Interior: Dust and debris can accumulate inside the printer, affecting its performance. Regularly clean the interior using compressed air or a soft cloth to remove dust from fans, rollers, and vents. This also helps prevent overheating.
- Inspecting Thermal Heads (For Thermal Printers): In thermal printers, the print head heats up to transfer the image onto the film. Over time, residue can accumulate on the thermal head, impacting the quality of prints. Regular cleaning ensures accurate and clear imaging.
2. Printer Calibration for Image Quality: Key Calibration Steps
Calibration is crucial to maintaining consistent print quality, especially for medical applications where accuracy is paramount. The calibration process ensures that the printer is producing images with the correct contrast, brightness, and resolution.
- Adjusting Color Profiles: For printers that produce color images, such as in radiology or pathology, calibration of color profiles ensures the printed images match the digital ones in terms of brightness, hue, and contrast. Many printers offer built-in calibration tools to align color output with industry standards.
- Optimizing Grayscale: Grayscale calibration is especially important for diagnostic imaging like X-rays or MRIs. Calibration tools can adjust the tonal range, ensuring that the grayscale output accurately reflects the medical image’s intensity levels.
- DICOM Calibration: For printers used in radiology, it’s essential to ensure that images meet DICOM (Digital Imaging and Communications in Medicine) standards. Many medical printers are equipped with DICOM-compliant calibration options, which guarantee that the printed images adhere to these critical medical standards.
3. Monitoring Printer Settings: Key Considerations
Maintaining optimal settings ensures that the printer produces consistent results and avoids unnecessary wear.
- Resolution Settings: Ensure that the resolution is set according to the specific diagnostic needs. High-resolution settings provide better image quality but may also slow down the printer and consume more ink or toner. Adjust the settings for a balance between quality and efficiency.
- Media Type Settings: Printers often have different settings for various types of media (such as film, paper, or other materials). Ensure that the correct media type is selected to avoid damage to the printer or poor-quality prints.
4. Replacing Worn Parts: Parts to Monitor
Over time, parts like print heads, rollers, drums, and belts wear out and need replacement. Worn parts can lead to image distortion, paper jams, or even printer failure.
- Print Heads: Regularly inspect and replace print heads, especially in inkjet and thermal printers. A worn print head can lead to uneven image transfer or fading.
- Rollers: In both laser and inkjet printers, the rollers can become worn, causing paper misfeeds. Replacing worn rollers ensures smooth operation.
- Toner Drums: In laser printers, the toner drum plays a crucial role in transferring images. If the drum becomes scratched or worn, it can cause streaking or uneven prints.
5. Software and Firmware Updates: Benefits of Updating
Keeping your medical printer’s software and firmware up to date is crucial for optimal performance.
- Improved Print Quality: Updates often include new algorithms or features that can enhance print quality, such as better contrast or faster processing speeds.
- Enhanced Security: Updates also include security patches to protect sensitive patient data that may be processed through the printer.
- Bug Fixes and Stability Improvements: Manufacturers often release firmware updates to fix bugs or performance issues that may affect the printer’s functionality.
6. Regular Diagnostic Tests: What to Monitor
Many medical printers come with built-in diagnostic tools that help identify issues before they become serious problems.
- Print Test Patterns: Many printers allow you to print test patterns that help identify issues with alignment, resolution, or color balance. Regularly print these tests and compare them to baseline results to spot potential issues early.
- Error Logs: Review error logs generated by the printer to identify recurring problems or hardware issues that need attention.
7. Environmental Considerations: Best Practices
The environment in which the printer operates can also affect its performance and lifespan.
- Temperature Control: Keep the printer in a stable environment with appropriate temperature and humidity levels. Excess heat or moisture can damage internal components and affect print quality.
- Ventilation: Ensure that the printer has proper ventilation to avoid overheating, especially during heavy use. Blocked vents can cause performance issues.
Proper maintenance and calibration of medical printers are essential to ensuring consistent image quality, extending equipment life, and avoiding downtime. By regularly cleaning, calibrating, updating software, and replacing worn parts, healthcare facilities can keep their printers running efficiently, providing accurate diagnostic images that are critical for patient care.
Conclusion
Staying updated with the latest in medical printing isn’t just about fancy equipment; it’s about ensuring top-notch patient care. Every choice, right from the different types of printers to their features, can be a step towards better diagnostics.
Recommended Brands and Models
Diving into the market? Here’s a cheat sheet:
- Inkjet Printers: Canon Inkjet Printers IX6780 & Epson Inkjet Printers L1300
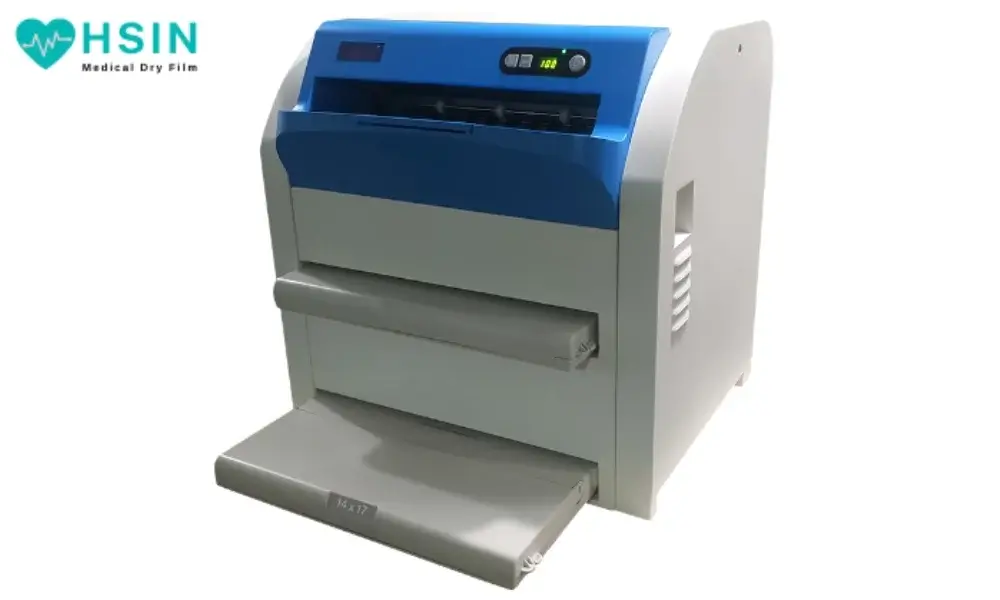
- Thermal Printers: HSIN Medical Thermal Printer
References
This guide is backed by hours of research, and here’s a nod to our sources: