
In the intricate realm of ankle injuries, distinguishing between a sprain and normal conditions is crucial for effective treatment. This comprehensive guide aims to decode the differences between a sprained ankle X-ray vs normal imaging, providing clarity on diagnostic approaches and fostering a path to swift recovery.
Table of Contents: Sprained Ankle X-ray vs Normal Imaging
Understanding Ankle Sprains

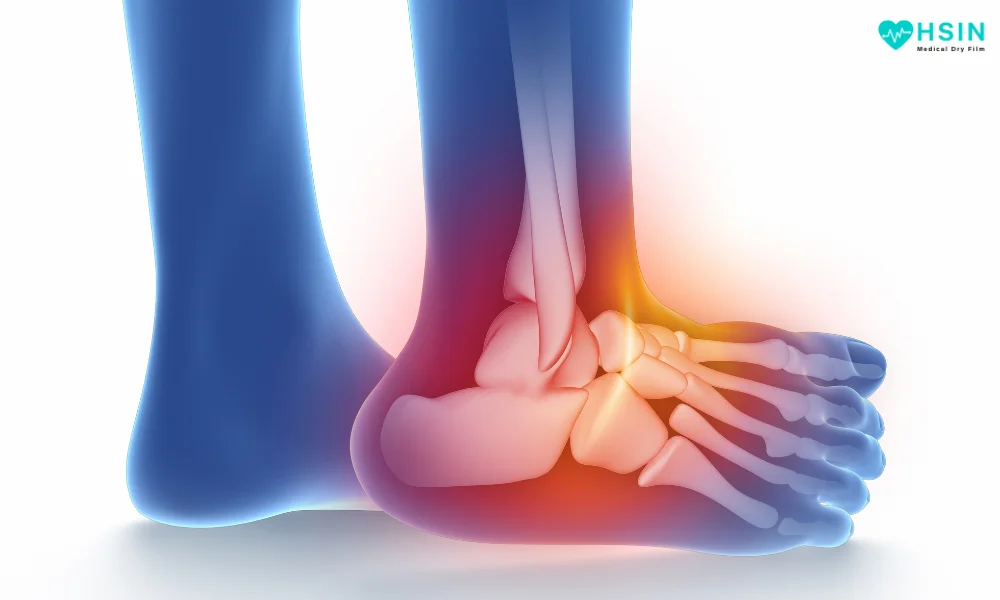
Exploring the Normal Anatomy of the Ankle
- Complex Joint Structure: The ankle is a complex joint that comprises several crucial components working in harmony.
- Bones: Three main bones form the ankle joint – the tibia, fibula, and talus – creating the structural foundation for support and movement.
- Ligaments: An intricate network of ligaments surrounds the joint, connecting bone to bone. Notable ligaments include the lateral ligaments (stabilizing the outer ankle) and the deltoid ligament (supporting the inner ankle).
- Tendons: Tendons connect muscles to bones, facilitating joint movement. In the ankle, the Achilles tendon is particularly significant, linking the calf muscles to the heel bone.
- Muscles: Various muscles around the ankle contribute to movement and stability, allowing for the complex range of motions required in daily activities. Understanding this intricate interplay is vital for assessing and addressing ankle-related issues.
Unraveling the Dynamics of Ankle Sprains
- Mechanism of Ankle Sprains: Ankle sprains typically occur when the ankle twists or turns beyond its normal range of motion, stretching or tearing the ligaments.
- Common Causes: Activities involving sudden changes in direction, uneven surfaces, or inadequate footwear contribute to the likelihood of ankle sprains.
- Specific Structures Affected: Ligaments, the connective tissues stabilizing the joint, are primarily affected. Commonly involved ligaments include the lateral ligaments (on the outer side) and the anterior talofibular ligament (ATFL), calcaneofibular ligament (CFL), and posterior talofibular ligament (PTFL).
- Inversion vs. Eversion: Inversion sprains, where the ankle rolls inward, are more frequent. Eversion sprains, involving outward rolling, are less common but can also lead to significant ligament damage.
- Grades of Sprains: Ankle sprains are categorized into grades based on the severity of ligament damage, ranging from mild (Grade I) to severe (Grade III). Understanding the specific structures affected guides accurate diagnosis and tailored treatment plans.
Importance of Imaging: Why Imaging Matters?
Challenges in Diagnosing Ankle Injuries without Imaging
- Deceptive Symptoms: External symptoms like swelling, pain, and limited mobility may not fully reveal the extent of damage.
- Risk of Oversight: Without imaging, there’s a potential risk of overlooking a serious sprain or underlying issues.
- Delayed Treatment: Failure to employ diagnostic tools can lead to delayed and inadequate treatment strategies.
- Exacerbated Injuries: Overlooking a sprain may exacerbate the injury, affecting recovery outcomes.
- Imaging Importance: Imaging plays a crucial role in providing a detailed perspective for accurate diagnosis.
- Optimal Recovery: Employing imaging ensures optimal recovery strategies tailored to the specific nature of ankle injuries.
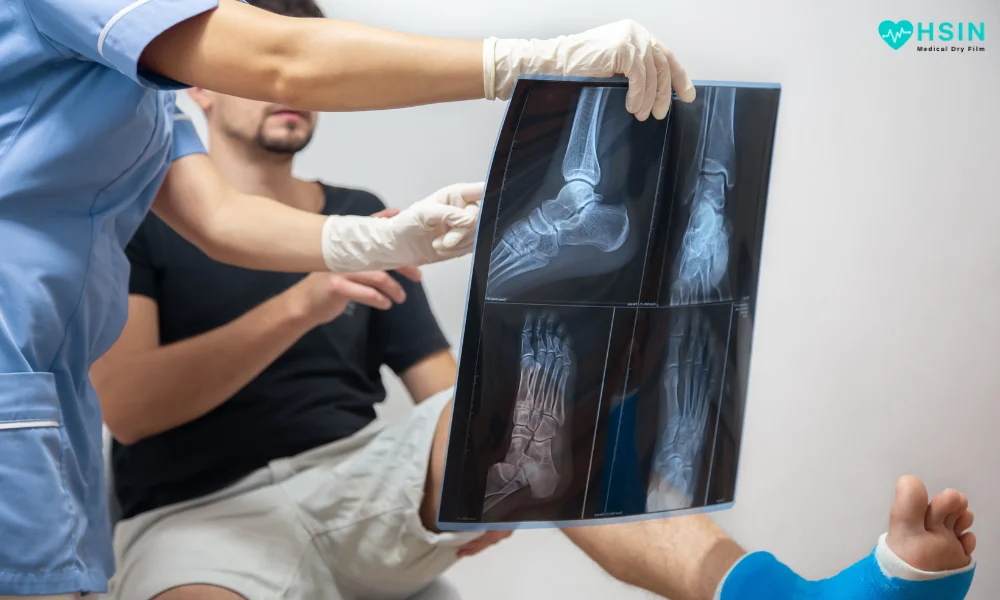
Significance of X-rays in Bone Injury Assessment
- Detailed Insights: X-rays offer detailed insights into bone injuries, providing a clear visualization of the affected area.
- Fracture Detection: They play a pivotal role in ruling out fractures by capturing images that reveal bone integrity.
- Precision in Diagnosis: X-rays enable healthcare professionals to precisely assess the extent and location of bone injuries.
- Quick Assessment: The efficiency of X-ray procedures allows for a rapid assessment, aiding prompt and accurate diagnosis.
- Foundation for Treatment: The information gathered from X-rays forms the foundation for developing targeted and effective treatment plans.
- Minimizing Complications: Timely use of X-rays helps in identifying fractures or bone-related issues early, minimizing the risk of complications.
Also read: Phosphor Plates in Dental X-rays
Sprained Ankle X-ray: What to Expect X-ray Procedure for Ankle Sprains
Necessity of X-rays for Suspected Ankle Sprains
- Assessing Severity: X-rays are recommended when healthcare professionals need to assess the severity of an ankle sprain, especially to rule out potential fractures.
- High-Impact Injuries: Instances involving high-impact injuries or trauma, where the force applied to the ankle is substantial, warrant X-rays to ensure no underlying fractures or bone damage.
- Inability to Bear Weight: If a patient experiences difficulty bearing weight on the injured ankle or persistent pain, X-rays become essential for a more comprehensive evaluation.
- Prolonged Swelling or Bruising: Persistent swelling or bruising around the ankle, lasting beyond the initial stages of the injury, prompts healthcare professionals to consider X-rays to rule out complications.
- Clinical Examination Uncertainty: In cases where a clinical examination alone cannot conclusively determine the extent of the injury, X-rays provide a more detailed and accurate diagnostic tool.
- Chronic or Recurrent Sprains: Individuals with a history of chronic or recurrent ankle sprains may undergo X-rays as part of a comprehensive assessment to identify any underlying structural issues contributing to the repeated injuries.
Ankle X-ray Procedure: A Step-by-Step Guide
1. Patient Positioning:
- The patient is typically positioned either standing or lying down, depending on the severity of the injury and the ability to bear weight on the affected ankle.
- For a standing X-ray, the patient is asked to place the injured foot on a specialized platform, allowing for weight-bearing images.
2. Alignment and Stability:
- Ensuring proper alignment and stability is crucial for accurate imaging. The patient is guided to position the foot and ankle precisely, often with the assistance of supporting devices or the technologist.
3. Protective Measures:
- Lead aprons or shields may be used to protect areas not involved in the imaging process, minimizing radiation exposure to adjacent tissues.
4. X-ray Machine Adjustment:
- The X-ray machine is adjusted to focus specifically on the ankle joint. Collimators are utilized to narrow the X-ray beam, ensuring targeted imaging of the area of interest.
5. Image Capturing:
- X-ray images are captured from different angles to provide a comprehensive view of the ankle joint. The technologist may instruct the patient to hold still during the brief exposure to obtain clear images.
6. Posterior-Anterior (PA) and Lateral Views:
- The standard X-ray series for ankles includes posterior-anterior (PA) and lateral views. PA views are taken with the patient facing the X-ray machine, while lateral views are captured from the side.
7. Additional Views if Necessary:
- In some cases, healthcare professionals may request oblique or stress views to evaluate specific structures or assess stability under additional conditions.
8. Image Evaluation:
- Once the images are captured, healthcare professionals evaluate them for any signs of fractures, dislocations, or abnormalities in the ligaments and bones.
Understanding the meticulous process of obtaining an ankle X-ray ensures a thorough assessment of the injury, guiding accurate diagnosis and facilitating the development of tailored treatment plans.
Deciphering X-ray Results for Ankle Sprains: Insights for Diagnosis and Severity Assessment
- Bone Alignment: Healthcare providers examine the X-rays to assess the alignment of the bones in the ankle. Misalignments or irregularities may indicate a potential sprain.
- Fracture Identification: Detailed scrutiny focuses on identifying any signs of fractures. Fracture lines, bone fragments, or displacement are indicators of a more severe injury beyond a simple sprain.
- Soft Tissue Assessment: Ligaments and soft tissues around the ankle are closely evaluated. Swelling, irregularities, or signs of tearing in these structures contribute to understanding the severity of the sprain.
- Joint Spaces: Examination of joint spaces is crucial. Uneven joint spaces or irregularities may suggest damage to the ligaments or possible dislocation, aiding in severity assessment.
- Comparative Analysis: Healthcare providers often compare X-rays of the injured ankle with those of the unaffected side for a baseline. Any discrepancies in bone alignment or soft tissue integrity provide valuable information.
- Stress Views (if applicable): In cases where stress views are taken, healthcare providers assess how the ankle responds under controlled stress. This helps gauge the stability of ligaments and aids in understanding the extent of the sprain.
- Radiographic Signs: Specific radiographic signs, such as the presence of an avulsion fracture (where a ligament pulls a fragment of bone away), provide further insights into the mechanism and severity of the sprain.
- Grade Classification: Ankle sprains are often classified into grades (I, II, III) based on the severity of ligament damage. X-ray results play a pivotal role in determining the appropriate grade, guiding treatment decisions.
- Clinical Correlation: X-ray findings are correlated with the patient’s clinical presentation, including symptoms and the mechanism of injury. This holistic approach ensures a comprehensive understanding of the sprain’s impact.
By meticulously interpreting X-ray results, healthcare providers not only diagnose ankle sprains but also gauge the severity, paving the way for tailored treatment plans and effective rehabilitation strategies.
Normal Imaging Techniques: Rule Out Fractures
Advancing Diagnostic Precision: MRI and CT Scans in Ankle Injury Assessment
1. Soft Tissue Visualization with MRI:
- Precision in Detail: Magnetic Resonance Imaging (MRI) excels in visualizing soft tissues, offering unparalleled detail of ligaments, tendons, and other structures surrounding the ankle joint.
- Distinguishing Features: MRI can distinguish between healthy and injured soft tissues, aiding in identifying tears, inflammation, or abnormalities that may not be evident in conventional X-rays.
2. CT Scans for Detailed Bone Imaging:
- Thorough Bone Assessment: Computed Tomography (CT) scans provide a detailed view of bone structures, facilitating the identification of fractures, dislocations, or complex bony injuries in the ankle.
- 3D Visualization: CT scans offer three-dimensional reconstructions, enabling healthcare providers to assess the spatial relationships of bones and detect subtle fractures that might be challenging to visualize in traditional X-rays.
3. Ruling Out Fractures:
- Comprehensive Fracture Evaluation: Both MRI and CT scans play a crucial role in ruling out fractures that may not be adequately captured by standard X-rays.
- Identifying Hairline Fractures: MRI, with its sensitivity to bone marrow changes, can detect hairline fractures that might be missed in other imaging modalities.
4. Assessing Joint Stability:
- Ligamentous Integrity: MRI is particularly effective in evaluating the integrity of ligaments, showcasing any tears or disruptions that might compromise joint stability.
- Dynamic CT for Stress Testing: Dynamic CT scans can be employed to assess joint stability under stress conditions, providing valuable information for certain ankle injuries.
5. Treatment Planning Guidance:
- Precision for Surgical Planning: Both MRI and CT scans contribute crucial data for surgical planning in complex cases, ensuring precise interventions and optimal outcomes.
- Tailored Rehabilitation: The detailed information obtained from advanced imaging assists in tailoring rehabilitation plans, addressing specific soft tissue or bony issues identified during the diagnostic process.
6. Holistic Diagnostic Approach:
- Combined Use: Integrating information from X-rays, MRI, and CT scans allows for a comprehensive diagnostic approach, providing a complete understanding of the ankle injury, from bone fractures to soft tissue involvement.
Unveiling the Role of Ultrasound in Ankle Injury Assessment
- Ligament and Tendon Dynamics Real-Time Imaging: Ultrasound provides real-time, dynamic imaging of ligaments and tendons in the ankle, capturing their movement and functionality during various joint positions.
- Assessing Ligament Condition: Ultrasound is effective in assessing the integrity of ligaments by visualizing their structure, identifying tears, strains, or any abnormalities affecting stability.
- Detailed Tendon Imaging: Tendons, critical for joint movement, can be meticulously evaluated through ultrasound, detecting conditions such as tendonitis, tears, or inflammation.
- Precise Injury Localization: Ultrasound enables precise localization of injuries, allowing healthcare providers to pinpoint the affected area and tailor treatment strategies accordingly.
- Real-Time Interventional Procedures: Ultrasound serves as a real-time guide for interventional procedures, such as injections or aspirations, ensuring accuracy in targeting specific ligaments or tendons.
- Contrast with Healthy Structures: By comparing injured structures with healthy ones, ultrasound aids in identifying discrepancies in thickness, texture, or movement, contributing to a more accurate diagnosis.
- Patient Interaction: The immediacy of ultrasound allows for patient interaction during the examination. Patients can actively participate, providing feedback on pain or discomfort in specific positions.
- Minimal Disruption: Ultrasound is non-invasive, minimizing discomfort for patients. It also offers a cost-effective alternative for initial assessments of ligament and tendon injuries.
- Assessing Stability: Dynamic stress testing, achievable with ultrasound, assists in evaluating joint stability and the impact of movement on ligament and tendon function.
- Tracking Recovery Progress: Ultrasound plays a role in monitoring the progress of rehabilitation, allowing healthcare providers to assess the healing of ligaments and tendons over time.
- Point-of-Care Imaging: The portability of ultrasound machines facilitates point-of-care imaging, enabling quick assessments in various healthcare settings.
Differential Diagnosis: Sprain vs. Fracture
Distinguishing Sprained Ankle from Fractured Ankle: X-ray Signs
- Fracture Lines: X-rays may reveal clear fracture lines, indicating a break in the continuity of the bone. The presence of distinct lines is a primary sign of a fracture.
- Displacement of Bones: Displacement of bone fragments is a strong indicator of a fracture. X-rays show bones out of their normal alignment, highlighting the severity of the injury.
- Avulsion Fractures: Avulsion fractures, where a ligament or tendon pulls a fragment of bone away, can be visible on X-rays. These fractures suggest a significant force impacting the ankle.
- Bone Deformities: Any visible deformities in the bone structure, such as angulation or abnormal shapes, strongly suggest a fracture rather than a sprain.
- Joint Widening or Separation: X-rays may reveal widening or separation of the joint space, indicating a disruption in the normal alignment of the bones within the ankle joint.
- Bone Fragmentation: Presence of bone fragments or pieces that do not align correctly signifies a fractured ankle. This fragmentation is a key differentiator from a sprain.
- Cortical Interruption: Interruption in the smooth cortical outline of the bone is a crucial sign. This can manifest as a clear break or irregularities in the bone surface.
- Soft Tissue Swelling: Soft tissue swelling may be present in both sprained and fractured ankles. However, when accompanied by clear signs of bone damage on X-rays, it indicates a fracture.
- Normal Bone Alignment: X-rays of sprained ankles typically show normal bone alignment. While soft tissue swelling may be present, the bones themselves maintain their regular positions.
- Ligament and Tendon Integrity: X-rays are not as effective in directly visualizing ligaments and tendons. However, normal bone alignment, coupled with minimal soft tissue swelling, suggests a sprain with intact ligaments.
- Clinical Correlation: It’s essential to correlate X-ray findings with the patient’s clinical presentation. For instance, severe pain upon weight-bearing may indicate a fracture, reinforcing X-ray evidence.
- Multiple Views for Clarity: Taking X-rays from different angles provides a more comprehensive view. This approach helps ensure that subtle fractures or complex fractures are not overlooked.
Understanding these specific signs on X-rays aids healthcare providers in accurately differentiating between a sprained and a fractured ankle, guiding appropriate treatment strategies, and facilitating optimal patient care.
Harmonizing Clinical Expertise and Imaging Insights: The Essence of Accurate Diagnosis
- Comprehensive Patient Assessment: Clinical evaluation provides a holistic understanding of the patient’s symptoms, history, and the mechanism of injury. This context is invaluable for guiding the diagnostic process.
- Aligning with Patient Complaints: Clinical evaluation allows healthcare providers to directly address and correlate imaging findings with the patient’s reported symptoms, ensuring a tailored approach to diagnosis.
- Observing Movements and Responses: Clinical examination includes dynamic assessments, such as observing how the patient moves or responds to specific maneuvers. This dynamic insight complements static imaging findings.
- Palpation and Tenderness: The ability to palpate and identify areas of tenderness during clinical evaluation aids in pinpointing specific regions of concern, guiding the focus of further imaging investigations.
- Patient Interaction and History: Interacting with the patient during clinical evaluation allows for direct communication. Understanding their concerns, pain thresholds, and previous medical history enhances the diagnostic process.
- Immediate Feedback: Unlike imaging, clinical evaluation provides immediate feedback. Healthcare providers can adjust the examination in real-time based on patient responses, ensuring a nuanced and patient-centered approach.
- Identifying Functional Limitations: Clinical evaluation extends beyond structural changes seen in imaging. It identifies functional limitations, contributing to a more comprehensive understanding of the impact of the injury on daily activities.
- Incorporating Patient Preferences: Understanding patient preferences, such as their willingness or reluctance for specific interventions, allows healthcare providers to tailor the diagnostic approach according to individual needs.
- Balanced Decision-Making: Clinical evaluation helps in avoiding over-reliance on imaging alone. It encourages a balanced decision-making process, ensuring that imaging is used as a supplement rather than the sole determinant.
- Guiding Further Diagnostic Steps: Clinical findings serve as a guide for ordering specific imaging studies. This sequential approach optimizes resources, focusing on targeted investigations based on initial clinical impressions.
- Enhancing Diagnostic Accuracy: Combining clinical expertise with imaging findings significantly enhances diagnostic accuracy. It allows for a nuanced interpretation of imaging results in the context of the patient’s unique clinical presentation.
- Personalized Care: The combination of clinical and imaging information facilitates the development of personalized treatment plans. Tailoring interventions based on both aspects ensures optimal outcomes for the patient.
Treatment Strategies: Tailored Treatment Plans

Nurturing Healing: Non-Surgical Strategies for Ankle Sprain Management
- Crucial Initial Phase: Allowing the injured ankle adequate rest is paramount. Restrict weight-bearing activities and provide the affected ligaments time to heal. Immobilization through bracing or splinting may be recommended.
- Cooling Comfort: Applying ice to the sprained ankle helps alleviate pain and reduce swelling. The cold therapy constricts blood vessels, diminishing inflammation. Ice packs or cold compresses should be applied in intervals, avoiding direct skin contact.
- Stabilizing Support: Compression, often achieved with an elastic bandage, provides stability to the injured ankle. This support helps minimize swelling and prevents excessive movement during the initial stages of healing.
- Fluid Drainage Assistance: Elevating the sprained ankle above heart level assists in fluid drainage and reduces swelling. This simple yet effective measure is particularly beneficial during periods of rest.
- Pain and Inflammation Control: Over-the-counter NSAIDs, such as ibuprofen, can be employed to manage pain and inflammation. However, their prolonged use should be monitored, considering potential side effects.
- Rehabilitation Focus: Physiotherapy plays a central role in ankle sprain recovery. A skilled physiotherapist tailors exercises to improve strength, flexibility, and proprioception. This aids in restoring normal function and preventing future injuries.
- Gradual Mobilization: Gentle exercises that encourage ankle movement without causing strain are introduced. These exercises enhance flexibility and prevent stiffness during the healing process.
- Building Resilience: Specific exercises target the muscles surrounding the ankle, promoting strength and stability. This helps prevent recurrent sprains and supports overall joint health.
- Balance Enhancement: Proprioception exercises focus on improving balance and spatial awareness. This is crucial for preventing future injuries by enhancing the body’s ability to respond to changes in terrain or movement.
- Tissue Healing Aid: Ultrasound therapy may be utilized to stimulate blood flow and promote the healing of soft tissues. This non-invasive modality can accelerate the recovery process.
- Enhancing Mobility: Physiotherapists may employ manual techniques to mobilize the ankle joint gently. This aids in restoring normal joint function and reducing stiffness.
- Real-World Application: Functional rehabilitation involves simulating real-world movements to ensure the ankle can handle daily activities. This phase of physiotherapy focuses on transitioning the patient back to their regular activities.
- Bracing and Supportive Devices: While initially used for stability, supportive devices like braces or ankle sleeves are gradually phased out as the ankle strengthens. This allows for a progressive return to normal function.
- Home Exercise Programs: Physiotherapists often design home exercise programs, empowering individuals to participate in their recovery actively. Consistent adherence to prescribed exercises is crucial for long-term success.
Tailoring Treatment: Varied Approaches to Ankle Fracture Management
- Alignment Correction: In cases where the fracture alignment is slightly displaced, closed reduction involves manipulating the bones back into their proper position without surgical intervention. This is often followed by casting or bracing.
- Stabilizing Support: Casting is a common non-surgical approach for ankle fractures. It involves applying a cast around the affected area to immobilize the bones, promoting alignment and healing. The type of cast may vary based on the fracture severity.
- Gradual Mobility: Functional braces allow controlled movement of the ankle during the healing process. These braces provide support while permitting certain degrees of mobility, aiding in preventing stiffness.
- Surgical Precision: ORIF is a surgical procedure where the fracture is realigned, and internal fixation devices such as screws, plates, or rods are used to secure the bones in the correct position. This approach is suitable for complex or unstable fractures.
- Temporary Stabilization: External fixation involves the use of pins or screws placed outside the body to stabilize fractured bones. It is often employed as a temporary measure, providing stability until further interventions can be performed.
- Internal Support: In this surgical technique, a nail or rod is inserted into the medullary canal of the bone to provide internal support. Intramedullary nailing is particularly effective for certain types of ankle fractures.
- Small Incisions, Significant Impact: Minimally invasive procedures use small incisions and specialized instruments to realign and stabilize ankle fractures. This approach aims to reduce tissue damage and promote quicker recovery.
- Precision with Pins: Percutaneous pinning involves inserting wires or pins through the skin and into the fractured bones to maintain alignment. This is often used for fractures that can be managed without open surgery.
- Preserving Joint Surfaces: For fractures involving joint surfaces, surgical repair is essential to restore the anatomy of the joint. Techniques may include fixation, grafting, or other measures to ensure proper joint function.
- Secure Stability: Plating involves attaching metal plates to the surface of the bone using screws. This provides stable support for fractured segments, aiding in the healing process.
- Facilitating Healing: In cases where there is a gap in the bone or compromised bone quality, bone grafting may be performed. This involves adding bone tissue to promote healing and strengthen the affected area.
- Guided Recovery: Regardless of the surgical approach, postoperative rehabilitation is crucial. Physical therapy helps restore mobility, strength, and function while minimizing the risk of complications.
- Weight-Bearing Progression: After the initial period of immobilization or restricted weight-bearing, a gradual progression to full weight-bearing is supervised. This phase is crucial for restoring normal function.
- Monitoring and Follow-Up: Continuous monitoring and follow-up appointments are essential to assess the healing process, address any concerns, and adjust the treatment plan as needed.
Recovery and Rehabilitation: Rehabilitation Protocols
Rebuilding Stability: Ankle Sprain Rehabilitation Protocols
- Gentle Mobilization: Initiate rehabilitation with gentle ankle movements to promote early range of motion. Controlled circles, toe taps, and alphabet tracing with the toes are beneficial exercises.
- Ankle Flexibility: Sitting or standing, tap the toes on the floor, alternating between feet. This exercise enhances ankle flexibility and encourages blood circulation to the injured area.
- Strengthening the Calf Muscles: Gradually introduce calf raises to strengthen the muscles supporting the ankle. Begin with partial raises and progress to full raises as strength improves.
- Enhancing Toe Strength: Place a towel on the floor and use the toes to scrunch it toward you. This simple exercise targets the intrinsic muscles of the foot, aiding in overall ankle stability.
- Strengthening the Ankles: Utilize resistance bands to perform exercises that target ankle stability. Dorsiflexion, plantarflexion, inversion, and eversion exercises contribute to comprehensive strength development.
- Proprioception Enhancement: Standing on one leg or using stability boards challenges proprioception. These exercises improve balance and spatial awareness, crucial for preventing future sprains.
- Gait Improvement: Practice walking in a straight line, placing the heel of one foot directly in front of the toes of the other. This exercise enhances gait and helps regain normal walking patterns.
- Single-Leg Stance: Stand on the injured leg, gradually increasing the duration. This exercise isolates the stabilizing muscles, promoting strength and control.
- Controlling Movements: Incorporate eccentric exercises, such as slowly lowering the heel from a calf raise position. These exercises emphasize controlled lengthening of the muscles, aiding in overall control.
- Ankle Alphabet Exercises: Imaginary alphabet tracing with the toes engages the ankle in various ranges of motion. This dynamic exercise enhances flexibility and mobility.
- Gentle Stretching: While seated, gently stretch the ankle by flexing and pointing the foot. This helps alleviate stiffness and contributes to improved flexibility.
- Targeted Muscle Activation: Secure a resistance band around a fixed point and the foot. Perform controlled inversion and eversion movements against resistance to strengthen lateral ankle muscles.
- Flexibility Enhancement: Include calf stretches in the rehabilitation routine. Both seated and standing calf stretches contribute to overall ankle flexibility.
- Heel Cord Strengthening: Place a towel under the toes and pull it toward you using the foot. This targets the muscles in the heel cord, aiding in strength and stability.
- Progressive Plyometric Exercises: Gradually introduce jumping and hopping exercises once basic strength and stability are regained. Plyometrics enhance dynamic strength and prepare the ankle for more challenging activities.
Guiding Recovery: Phased Rehabilitation for Ankle Fractures
- Initial Immobilization Phase: Begin with a period of immobilization using a cast, brace, or splint to allow the fractured bones to heal. During this phase, focus on pain management and preventing further damage.
- Swelling Management: Employ techniques to control swelling, such as elevation of the affected leg and cold compress application. This helps minimize inflammation, promoting a conducive environment for healing.
- Maintaining Mobility: Once cleared by the healthcare provider, introduce gentle active ROM exercises. Ankle circles and toe pointing help maintain joint mobility without putting excessive stress on the healing bones.
- Gradual Loading: Transition to partial weight-bearing as guided by the healthcare team. Use crutches or a walker to support weight on the injured ankle while promoting controlled movement.
- Muscle Activation: Initiate gentle strengthening exercises for the muscles around the ankle. Isometric exercises, such as toe curls, aid in activating the muscles without placing too much stress on the healing bones.
- Building Stability: Integrate balance exercises to enhance proprioception. Standing on one leg, utilizing wobble boards, or performing controlled movements on stable surfaces contribute to improved stability.
- Assisted Full Weight-Bearing Phase: As healing progresses, gradually transition to assisted full weight-bearing. This may involve using a supportive boot or brace while allowing more weight on the injured ankle.
- Joint Mobilization Techniques: Incorporate joint mobilization exercises to restore normal joint movement. These techniques, performed under professional guidance, aim to prevent joint stiffness and enhance flexibility.
- Functional Exercises: Introduce functional exercises that mimic daily activities. This phase focuses on restoring the ability to perform tasks such as walking, climbing stairs, and standing on tiptoes.
- Cardiovascular Conditioning: Include low-impact cardiovascular exercises, such as stationary cycling or swimming, to improve overall cardiovascular fitness without subjecting the healing ankle to excessive stress.
- Walking Confidence: Progress to full weight-bearing without assistance, emphasizing a normal gait pattern. Gait training helps regain a natural walking rhythm while ensuring proper weight distribution.
- Progressive Strength Training: Advance to progressive strength training exercises. This includes resistance exercises using bands, weights, or machines to enhance muscle strength and overall joint stability.
- Impact Activities Gradual Introduction: Introduce activities with impact gradually. Jumping, hopping, or jogging should be introduced based on individual tolerance and under professional guidance.
- Ongoing Monitoring and Maintenance: Even after completing the formal rehabilitation program, continue to monitor the ankle’s health. Regular maintenance exercises, periodic check-ups, and adherence to a balanced fitness routine contribute to sustained recovery.
Importance of Professional Guidance: Seeking Professional Advice

In the journey towards recovery from ankle injuries, the guidance and expertise of healthcare professionals play an indispensable role. Here’s why consulting these experts is crucial:
- Expert Assessment: Healthcare professionals, including orthopedic specialists and radiologists, possess the knowledge and skills to accurately diagnose ankle injuries. From fractures to sprains, their expertise ensures a precise understanding of the injury’s nature and severity.
- Individualized Care: Every ankle injury is unique, requiring a personalized approach to treatment. Healthcare professionals formulate tailored plans that consider the specific injury, patient characteristics, and lifestyle factors. This ensures the most effective and efficient path to recovery.
- Radiological Expertise: Interpreting X-rays, MRIs, and other imaging results requires specialized knowledge. Healthcare professionals, especially radiologists, provide detailed insights into these images, guiding the diagnosis and subsequent treatment decisions.
- Comprehensive Evaluation: Healthcare professionals assess not only the immediate injury but also potential risk factors. Factors like pre-existing conditions, lifestyle, and overall health are taken into account, enabling a holistic approach to treatment and prevention of future injuries.
- Patient Education: An essential aspect of healthcare professionals’ role is to educate patients about their condition. This empowers individuals to make informed decisions about their treatment, understand the importance of rehabilitation, and actively participate in their recovery journey.
- Physiotherapist Expertise: Physiotherapists, integral members of the healthcare team, provide specialized guidance on rehabilitation exercises. Their expertise ensures that rehabilitation programs are tailored to the specific needs of the patient, promoting optimal recovery.
- Ongoing Assessment: Healthcare professionals continuously monitor a patient’s progress throughout the recovery process. This allows for timely adjustments to treatment plans, ensuring that the rehabilitation is on track and addressing any emerging challenges.
- Effective Pain Relief: Ankle injuries often involve pain, and healthcare professionals employ various strategies for effective pain management. From medications to targeted interventions, they ensure that patients experience relief while minimizing potential side effects.
- Proactive Care: Healthcare professionals proactively address any potential complications that may arise during the recovery period. Their vigilance helps prevent issues such as infection, delayed healing, or long-term joint issues.
Conclusion: Empowering Recovery
In the intricate dance of ankle injuries, decoding the nuances between a sprained ankle and normal conditions is pivotal for effective treatment. Whether through targeted X-rays or advanced imaging techniques, a comprehensive diagnostic approach lays the foundation for tailored recovery plans. This guide serves as a compass, navigating the complexities of ankle injuries, and empowering individuals with the knowledge needed for a swift and informed recovery.